Introduction
Hey there! I’m Vignesh J, your friendly neighborhood Unity developer, currently rocking it at The Alter Office Pvt Ltd. We’re cooking up a turn-based multiplayer card game inspired by Marvel Snap ⚡. Think of it as a card game on steroids! 💪
As our game grew from a cute little caterpillar to a majestic butterfly 🦋, our server needs also skyrocketed. Enter Azure Load Balancer and VMSS to save the day!
Problem Statement
As we envision the future, we anticipate our multiplayer card game could face high loads of traffic, making it crucial to manage server load and ensure a seamless gaming experience for players. Our initial setup using the Riptide networking solution in C# was efficient but lacked the scalability needed to handle fluctuating player loads. Manually scaling the servers was like trying to inflate a hot air balloon with a bicycle pump—impractical and slow. This led to performance issues during peak times, affecting the overall player experience.
Why We Chose This Solution
To tackle these challenges, we needed an automated and robust solution for server scaling and load balancing. After diving into the deep end of research, we found that Azure Load Balancer and Virtual Machine Scale Sets (VMSS) were the dynamic duo we needed. Here’s why:
- Automated Scaling: VMSS is like having a magic wand 🪄 that automatically scales the number of server instances based on current demand, ensuring optimal performance during peak and off-peak times without manual intervention.
- Efficient Load Distribution: Azure Load Balancer acts like a traffic cop 🚦, distributing incoming traffic evenly across multiple VMs. This prevents any single server from becoming a bottleneck and keeps the game running smoothly.
- Cost Efficiency: By scaling in when demand is low, we can save some coins 💰 by optimizing resource usage and reducing operational costs.
- High Availability: The combo of load balancing and health probes ensures that only the healthy, fully-charged VMs handle player traffic, enhancing the reliability and availability of our game servers. Think of it as making sure only the freshest pizzas 🍕 are served to customers.
This solution not only addresses our immediate needs for scalability and performance but also positions us for future growth, providing a resilient and flexible infrastructure capable of supporting our game’s expanding player base. With Azure, we’re not just keeping up with player demand; we’re ready to leap ahead 🚀!
Setting up a Load Balancer
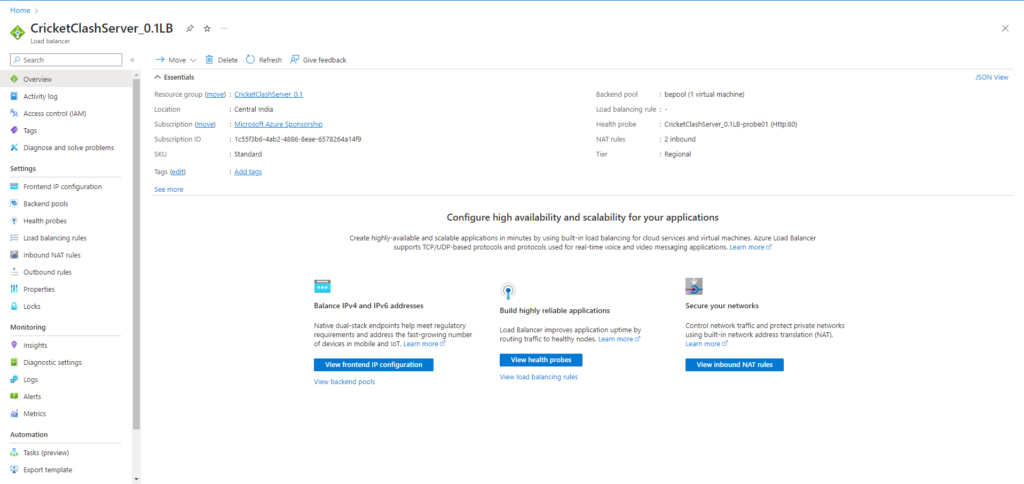
Step 1: Navigate to the Azure Portal and on add resources, create a new Load Balancer.
Step 2: Give it a cool name, region, and resource group 🗺️.
Step 3: Pick your type – Public or Internal. Choose wisely, young padawan! 🌟

Configuring the Load Balancer
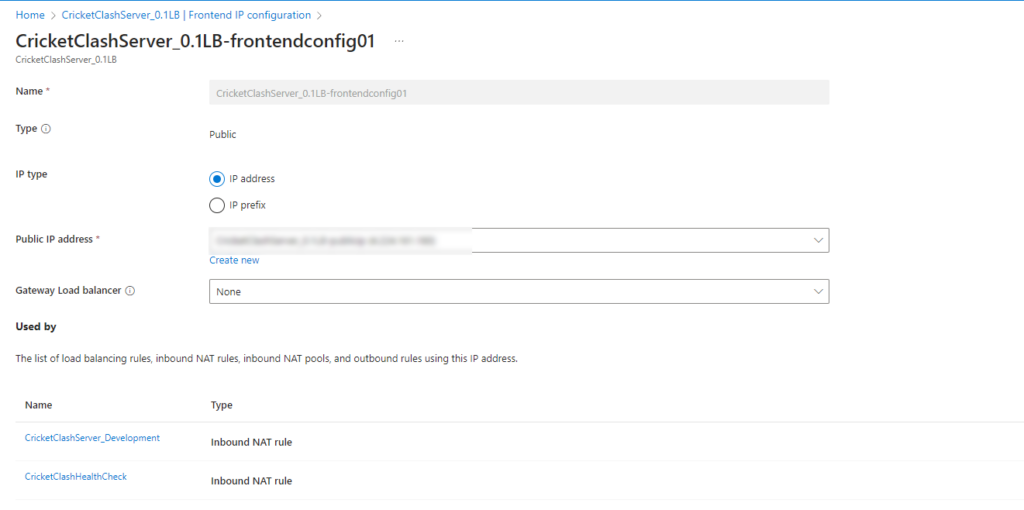
Frontend IP Configuration: Think of the Frontend IP as the public face of your game server, like setting up your gaming console to connect to the internet 🎮. This IP address is what players will connect to when they access your game. It serves as the entry point for all incoming traffic.
Steps to configure:
- Navigate to the Azure Portal: Log in to your Azure account and open the Azure Portal.
- Create a Load Balancer:
- In the left-hand menu, select “Create a resource” and search for “Load Balancer.”
- Click on “Create” to start the setup.
- Basic Configuration:
- Fill in the necessary details such as name, region, and resource group.
- Choose the type of Load Balancer (Public or Internal) based on your needs.
- Frontend IP Setup:
- Go to the “Frontend IP configuration” section and click “Add.”
- Configure the IP address and subnet. This is the public-facing IP that players will use to connect to your game, like setting up your gaming console to connect to the internet 🎮.

Backend Pools: Backend pools are like assembling your team of superheroes 🦸♂️🦸♀️ to handle the game traffic. Each backend pool consists of multiple VMs (virtual machines) that will host your game servers. The Load Balancer distributes incoming traffic across these VMs to ensure no single server gets overwhelmed, providing a smoother gaming experience for players.
Steps to configure:
- Create Backend Pool:
- In the Load Balancer settings, navigate to “Backend pools” and click “Add.”
- Name the backend pool and add the VMs or VM Scale Sets that will host your game servers. This is like selecting your team of superheroes who will handle the game traffic 🦸♂️🦸♀️.
- Associate VMs:
- Select the virtual machines or scale sets you want to include in the backend pool. These VMs will share the load and ensure smooth gameplay 🕹️.

Health Probes & Load Balancing Rules: Health probes are like checking if your pizza 🍕 is cooked to perfection before sharing it with friends. They continuously monitor the status of your VMs to ensure they are running smoothly. If a VM fails the health check, the Load Balancer stops sending traffic to it until it is back to normal.
Load balancing rules define how incoming traffic should be distributed across the VMs in the backend pool. These rules help ensure that all VMs share the load equally, preventing any single VM from becoming a bottleneck.
Steps to configure:
- Create Health Probe:
- Navigate to “Health probes” and click “Add.”
- Configure the health probe with the necessary protocol (TCP/HTTP), port, interval, and unhealthy threshold settings. This is like checking if your pizza 🍕 is cooked to perfection before sharing it with friends. The health probe ensures that only healthy VMs receive traffic.
- Settings:
- Set the appropriate settings to regularly check the health of the VMs, ensuring they are running smoothly and can handle player traffic.
- Create Load Balancing Rule:
- Navigate to “Load balancing rules” and click “Add.”
- Configure the rule with the following details:
- Name: Provide a name for the load balancing rule.
- Frontend IP: Select the frontend IP configuration you created earlier.
- Backend Pool: Select the backend pool that contains your VMs.
- Protocol: Choose the protocol (TCP/UDP).
- Port: Specify the frontend and backend port.
- Health Probe: Select the health probe you configured. This rule ensures that traffic is distributed evenly across your VMs, preventing any single VM from becoming a bottleneck.
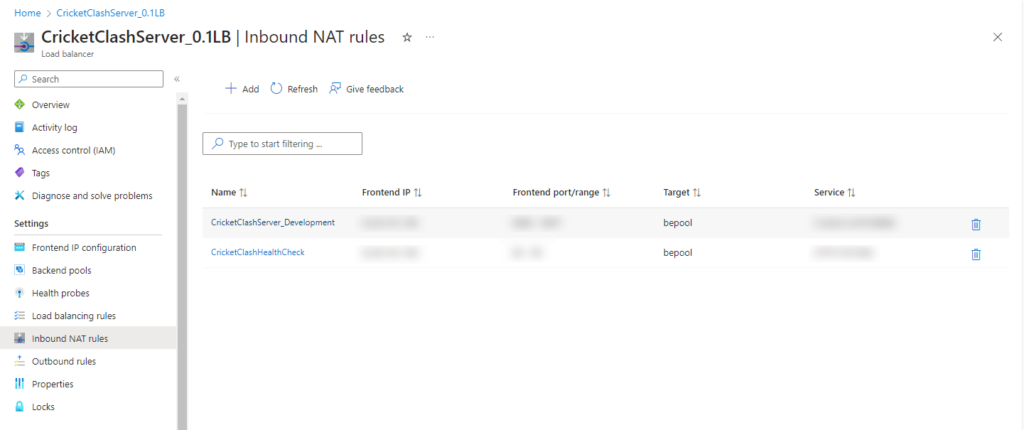
Inbound NAT Rules: Inbound NAT (Network Address Translation) rules are like directing specific types of traffic to the right place, much like assigning different tasks to team members based on their strengths. These rules map inbound traffic on specific ports of the frontend IP to corresponding ports on the VMs in the backend pool. This allows you to manage traffic for specific services or applications running on your VMs, ensuring that each request is handled by the appropriate server.
Steps to configure:
- Create Inbound NAT Rule:
- Navigate to “Inbound NAT rules” and click “Add.”
- Configure the rule with the necessary details:
- Name: Provide a name for the NAT rule.
- Frontend IP: Select the frontend IP configuration.
- Protocol: Choose the protocol (TCP/UDP).
- Port Mapping: Define the external port (on the frontend IP) and the internal port (on the VM). This is like directing specific types of traffic to the right place, ensuring that each request is handled by the appropriate server.
- Apply NAT Rule:
- Associate the rule with the specific VMs in your backend pool, mapping traffic to the correct ports on these VMs.
By following these steps, you will have a fully configured Azure Load Balancer distributing traffic across your VMs, ensuring high availability and reliability for your multiplayer card game 🎮.

Implementing VMSS (Virtual Machine Scale Sets) 🛠️
- Creating VMSS:
- Step 1: Back to the Azure Portal, create a new Virtual Machine Scale Set.
- Step 2: Provide details like name, region, OS image, and initial instance count.
- Step 3: Configure your authentication. Password or SSH key? Decisions, decisions! 🔑
- Scaling Policies:
- Autoscale Settings: Set the rules for scaling out (like calling in reinforcements 🏇) and scaling in (sending them back home 🏡).
- Scale Out/Scale In Rules: When CPU usage is above 70%, bring in the troops! When below 30%, let them rest.
- Integration with Load Balancer:
- Backend Pool Association: Add your VMSS to the backend pool like assembling the Avengers.
- Health Probes: Make sure they’re keeping an eye on your servers like a hawk.
Integrating with the Multiplayer Game 🎲
We configured the dedicated server to start automatically using systemctl 🛠️. It’s like setting your alarm but cooler! A health check service keeps an eye on server health, like your personal server doctor 🥼
Server Automation:
- Dedicated Server Service: Create a systemd service file for the dedicated server.
- Health Check Service: Another service file to check the server’s pulse. 💓
Scripts:
- Dedicated Server:
sudo nano /etc/systemd/system/dedicatedserver.service[Unit]Description=Dedicated Server for Multiplayer Card Game After=network.target[Service]ExecStart=/path/to/your/dedicatedserver WorkingDirectory=/path/to/your/working/directoryRestart=always User=yourusername[Install] WantedBy=multi-user.target - Health Check:
sudo nano /etc/systemd/system/healthcheck.service[Unit]Description=Health Check Service for Dedicated Server After=network.target[Service]ExecStart=/usr/bin/python3 /path/to/healthcheck.sh WorkingDirectory=/path/to/your/working/directoryRestart=alwaysUser=yourusername[Install]WantedBy=multi-user.target - HealthCheck shell Script that listens to port 80
!/bin/bash
Define the service that you want to check
SERVICE_NAME="cricketclashstart"
get_service_status(){
sudo systemctl status $SERVICE_NAME --no-pager
}
while true; do
echo "Listening on port 80…."
{
echo -e "HTTP/1.1 200 OKrnContent-Type: text/plainrnrn"
get_service_status
} |nc -l -p 80 -q 1
done
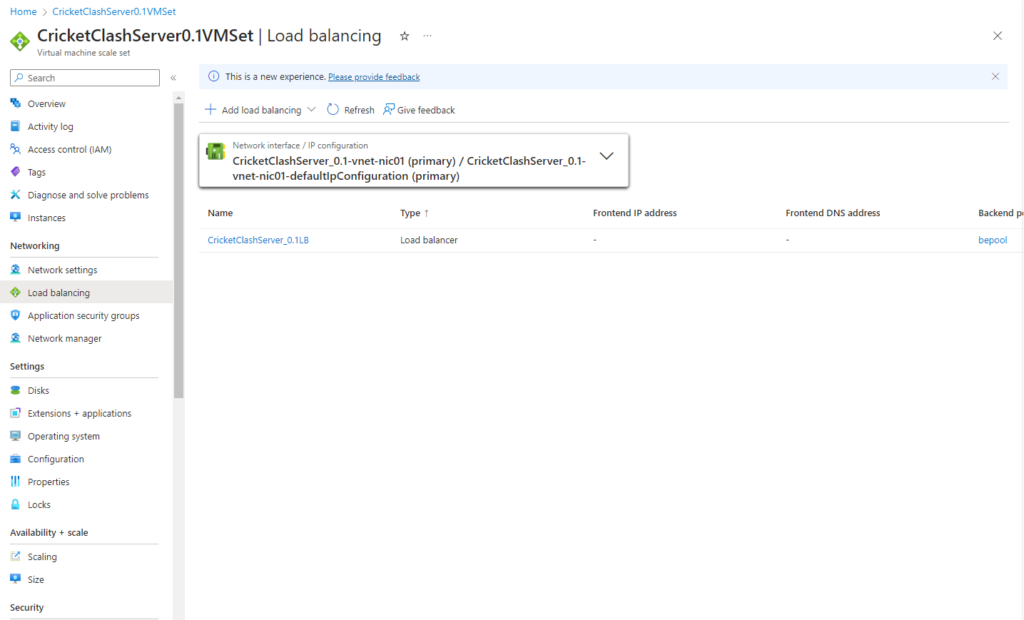
Check the load balancer is attached to the Virtual machine scale set by going to the Loadbalancing section in the VMSS.

Conclusion 🎉
- Summary: We integrated Azure Load Balancer and VMSS, making our servers scalable, reliable, and smooth like butter. Automated server startup and health checks streamlined our management, letting us focus on the fun stuff: game development! 🎮
- Benefits:
- Scalability: Servers scale automatically, no sweat! 💪
- High Availability: Even traffic distribution prevents bottlenecks. It’s like having a bouncer at a party 🎉.
- Cost Efficiency: Scale down when not needed, saving those precious coins 🪙.
- Simplified Management: Automation for the win! 🎉
- Future Improvements:
- Advanced Monitoring: More monitoring tools for those who love details 🔍.
- Geographical Load Balancing: Connecting players to the nearest server for a lag-free experience 🌍.
- Disaster Recovery: Just in case things go south, we’ll be ready 💥.
- Continuous Optimization: Keep tweaking and perfecting, like a master chef .
And that’s a wrap! Keep gaming and may your servers always be balanced! ✨
